Added Value Service:
3D Scanning

Parts in days anywhere in the USA.

Our 3D Scanning service offers:

Quality Matters  |  AS9100D Certified, ISO 9001:2015, ISO 13485:2016, & ITAR Registered

Certifications and Registrations

* Not all locations have all certifications and registrations. Parts requiring these will be made at facilities with the correct certifications and registrations.

3D Scanning
Our Digital Manufacturing Process is Simple.

Upload a CAD file and request a quote.

Our team starts production after finalizing project specifications and you accept the quote.

When the part has been completed and finished, it passes through quality control.

After your part goes through quality control, our team ships the part(s) to you.

Table of Contents

What is 3D scanning?

3D scanning involves capturing the 3D data of an object or environment using specialized equipment to create a precise digital image. This process includes emitting light or other electromagnetic radiation and measuring its reflection or absorption to produce a 3D representation of the object or space. The resulting data can be stored as a point cloud, which can then be used to generate 3D models for analysis, visualization, or engineering applications. Moreover, 3D scanning has many applications, including product design, reverse engineering, quality control, cultural heritage preservation, and medical imaging. It helps create accurate digital models of physical objects that can be modified, reproduced, or visualized digitally. Additionally, the technology continuously evolves, becoming more accessible and cost-effective, leading to broader adoption in various industries.

How does 3D scanning work?

Laser 3D scanning involves using a laser to emit a beam of light onto an object to measure its shape and geometry. Subsequently, the laser moves in a specific pattern across the object’s surface, capturing millions of data points through the reflection of the laser light. Sensors measure the time it takes for the laser light to bounce back from the object, allowing for the creation of a highly detailed 3D model of the object’s surface. This scanning process generates a cloud of data points that can be processed using specialized software to produce a 3D model file. The resulting 3D model has various applications, including 3D printing, reverse engineering, quality control, and inspection. Laser 3D scanning is a precise and reliable technology that provides accurate, high-resolution models, making it a valuable tool in many industries.
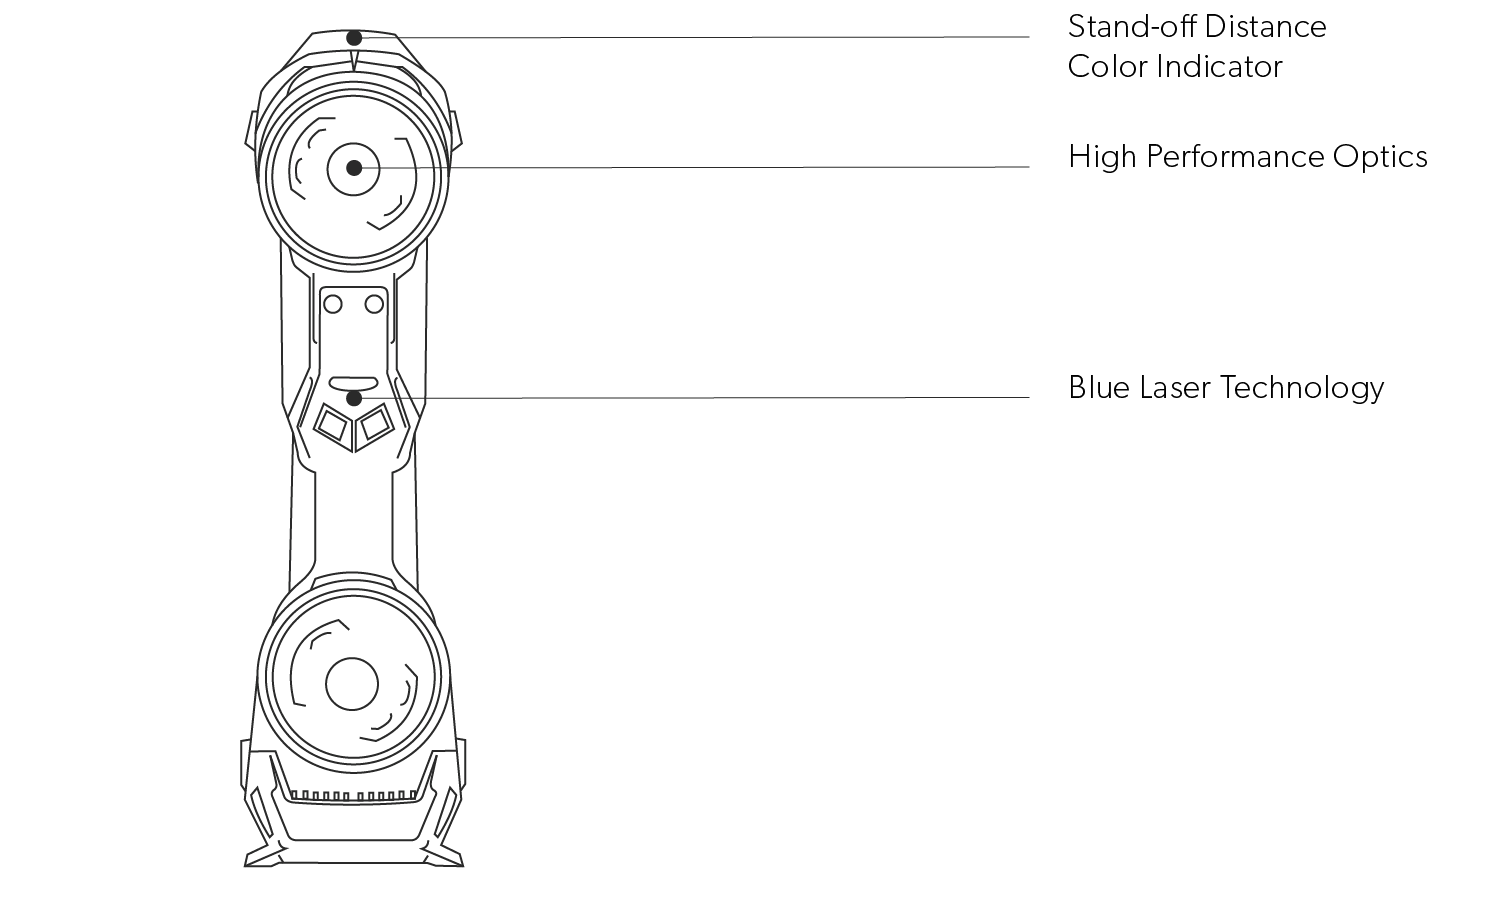
3D Scanning Line Drawing
Reverse Engineering

Laser 3D scanning enables the detailed geometry of a physical object to be captured and transformed into a 3D digital model. This process, reverse engineering, is commonly used in automotive, aerospace, and product design industries. It is beneficial when the original design data is unavailable or requires updating.

Moreover, engineers can create accurate and detailed digital models that can replicate or enhance existing designs. By digitally capturing a physical object’s precise shape and surface information, engineers can utilize the data to design new parts or updates that can be easily manufactured.

Additionally, this technique is a vital tool for reverse engineering, as it facilitates precise, efficient, and cost-effective redesign and re-manufacturing of parts and components.

Quality Control

Laser 3D scanning is an increasingly popular technology for quality control applications across various industries. This technology provides a highly accurate and efficient method for measuring and inspecting complex objects, including their shape, size, and surface details. Unlike traditional measurement techniques, which can be time-consuming, subjective, and prone to errors, 3D scanning offers more reliable and repeatable measurement data. Additionally, it can be performed non-destructively, making it particularly useful for inspecting fragile or expensive parts. Moreover, industries that benefit from 3D scanning services for quality control include aerospace, automotive, medical devices, and consumer goods. Adopting 3D scanning in quality control can lead to improved product performance, reduced defects, and increased customer satisfaction.

Prototek's Services

OEM:

HandySCAN BLACK™ | Elite

Accuracy:

.0009 in

Volumetric Accuracy:

.0008 in + .0005in/ft

Measurement Resolution:

.0009 in

Measurement Rate:

1,300,000 measurements/s

Scanning Area:

12.2 x 13.8 in

Depth of Field:

9.8 in

Recommended Part Size Range:

.15 – 13 ft

Output Formats:

.dae, .fbx, .ma, .obj, .ply, .stl, .txt, .wrl, .x3d, .x3dz, .zpr, .3mf

Transforming the manufacturing landscape.

Are you looking to revolutionize your product development process? With 3D scanning technology, you can take your innovation to the next level by creating products tailored to your customer’s unique needs. Our 3D scanning service enables you to capture the precise measurements of any object and create a digital model that can be used to manufacture customized products. Instead of relying on the traditional one-size-fits-all approach, you can now offer your customers products that fit their specific requirements, increasing customer satisfaction and loyalty. Upgrade your manufacturing process with 3D scanning technology and stay ahead of the competition.

With our advanced 3D scanning solutions, you can:

Why choose Prototek for your next project?

At Prototek, we provide an all-encompassing 3D scanning service that uses the latest scanning technology for utmost accuracy and precision. Our top-of-the-line facility and team of seasoned technicians ensure that every project is completed to the highest standards. We can handle various projects, from small parts to large objects, and offer multiple output formats, including fully optimized 3D models. At Prototek, we value customer satisfaction more than anything else and maintain clear communication, timely delivery, and affordable pricing. Whether you require a 3D scan for inspection, reverse engineering, or prototyping purposes, you can trust us to provide a dependable and efficient service.


What do our customers say about us?
They are competitively priced for their services and a very personable team to work with. If you haven't used them - do it! You'll have a lifelong vendor you be happy with that repeatedly goes above and beyond what is asked.
Product Designer
We are extremely happy with the quality of the parts as well as the level of service - thanks!
VP Product Designer

Standard Drill Bit Sizes

Drill Size

Imperial

Metric

#107

0.0019 in

0.0483 mm

0.05 mm

0.0020 in

0.0500 mm

#106

0.0023 in

0.0584 mm

#105

0.0027 in

0.0686 mm

#104

0.0031 in

0.0787 mm

#103

0.0035 in

0.0889 mm

#102

0.0039 in

0.0991 mm

0.1 mm

0.0039 in

0.1000 mm

#101

0.0043 in

0.1092 mm

#100

0.0047 in

0.1194 mm

#99

0.0051 in

0.1295 mm

#98

0.0055 in

0.1397 mm

#97

0.0059 in

0.1499 mm

#96

0.0063 in

0.1600 mm

#95

0.0067 in

0.1702 mm

#94

0.0071 in

0.1803 mm

#93

0.0075 in

0.1905 mm

0.2 mm

0.0079 in

0.2000 mm

#92

0.0079 in

0.2007 mm

#91

0.0083 in

0.2108 mm

#90

0.0087 in

0.2210 mm

#89

0.0091 in

0.2311 mm

#88

0.0095 in

0.2413 mm

#87

0.0100 in

0.2540 mm

#86

0.0105 in

0.2667 mm

#85

0.0110 in

0.2794 mm

#84

0.0115 in

0.2921 mm

0.3 mm

0.0118 in

0.3000 mm

#83

0.0120 in

0.3048 mm

#82

0.0125 in

0.3175 mm

#81

0.0130 in

0.3302 mm

#80

0.0135 in

0.3429 mm

#79

0.0145 in

0.3680 mm

1/64 in

0.0156 in

0.3969 mm

0.4 mm

0.0158 in

0.4000 mm

#78

0.0160 in

0.4064 mm

#77

0.0180 in

0.4572 mm

0.5 mm

0.0197 in

0.5000 mm

#76

0.0200 in

0.5080 mm

#75

0.0210 in

0.5334 mm

#74

0.0225 in

0.5715 mm

0.6 mm

0.0236 in

0.6000 mm

#73

0.0240 in

0.6069 mm

#72

0.0250 in

0.6350 mm

#71

0.0260 in

0.6604 mm

0.7 mm

0.0276 in

0.7000 mm

#70

0.0280 in

0.7112 mm

#69

0.0292 in

0.7417 mm

#68

0.0310 in

0.7874 mm

1/32 in

0.0313 in

0.7938 mm

0.8 mm

0.0315 in

0.8000 mm

#67

0.0320 in

0.8128 mm

#66

0.0330 in

0.8382 mm

#65

0.0350 in

0.8890 mm

0.9 mm

0.0354 in

0.9000 mm

#64

0.0360 in

0.9144 mm

#63

0.0370 in

0.9398 mm

#62

0.0380 in

0.9652 mm

#61

0.0390 in

0.9906 mm

1 mm

0.0394 in

1.0000 mm

#60

0.0400 in

1.0160 mm

#59

0.0410 in

1.0414 mm

#58

0.0420 in

1.0668 mm

#57

0.0430 in

1.0922 mm

1.1 mm

0.0433 in

1.1000 mm

#56

0.0465 in

1.1811 mm

3/64 in

0.0469 in

1.1906 mm

1.2 mm

0.0472 in

1.2000 mm

1.3 mm

0.0512 in

1.3000 mm

#55

0.0520 in

1.3208 mm

#54

0.0550 in

1.3970 mm

1.4 mm

0.0551 in

1.4000 mm

1.5 mm

0.0591 in

1.5000 mm

#53

0.0595 in

1.5113 mm

1/16 in

0.0625 in

1.5875 mm

1.6 mm

0.0630 in

1.6000 mm

#52

0.0635 in

1.6129 mm

1.7 mm

0.0669 in

1.7000 mm

#51

0.0670 in

1.7018 mm

#50

0.0700 in

1.7780 mm

1.8 mm

0.0709 in

1.8000 mm

#49

0.0730 in

1.8542 mm

1.9 mm

0.0748 in

1.9000 mm

#48

0.0760 in

1.9304 mm

5/64 in

0.0781 in

1.9844 mm

#47

0.0785 in

1.9939 mm

2 mm

0.0787 in

2.0000 mm

#46

0.0810 in

2.0574 mm

#45

0.0820 in

2.0828 mm

2.1 mm

0.0827 in

2.1000 mm

#44

0.0860 in

2.1844 mm

2.2 mm

0.0866 in

2.2000 mm

#43

0.0890 in

2.2606 mm

2.3 mm

0.0906 in

2.3000 mm

#42

0.0935 in

2.3749 mm

3/32 in

0.0938 in

2.3813 mm

2.4 mm

0.0945 in

2.4000 mm

#41

0.0960 in

2.4384 mm

#40

0.0980 in

2.4892 mm

2.5 mm

0.0984 in

2.5000 mm

#39

0.0995 in

2.5273 mm

#38

0.1015 in

2.5781 mm

2.6 mm

0.1024 in

2.6000 mm

#37

0.1040 in

2.6416 mm

2.7 mm

0.1063 in

2.7000 mm

#36

0.1065 in

2.7051 mm

7/64 in

0.1094 in

2.7781 mm

#35

0.1100 in

2.7940 mm

2.8 mm

0.1102 in

2.8000 mm

#34

0.1110 in

2.8194 mm

#33

0.1130 in

2.8702 mm

2.9 mm

0.1142 in

2.9000 mm

#32 

0.1160 in

2.9464 mm

3 mm

0.1181 in

3.0000 mm

3.1 mm

0.1221 in

3.1000 mm

1/8 in

0.1250 in

3.1750 mm

3.2 mm

0.1260 in

3.2000 mm

#30

0.1285 in

3.2639 mm

3.3 mm

0.1299 in

3.3000 mm

3.4 mm

0.1339 in

3.4000 mm

#29

0.1360 in

3.4544 mm

9/64 in

0.1406 in

3.5719 mm

5/32 in

0.1563 in

3.9688 mm

11/64 in

0.1719 in

4.3656 mm

3/16 in

0.1875 in

4.7625 mm

13/64 in

0.2031 in

5.1594 mm

7/32 in

0.2188 in

5.5563 mm

15/64 in

0.2344 in

5.9531 mm

1/4 in

0.2500 in

6.3500 mm

17/64 in

0.2656 in

6.7469 mm

9/32 in

0.2813 in

7.1438 mm

19/64 in

0.2969 in

7.5406 mm

5/16 in

0.3125 in

7.9375 mm

21/64 in

0.3281 in

8.3344 mm

11/32 in

0.3438 in

8.7313 mm

23/64 in

0.3594 in

9.1281 mm

3/8 in

0.3750 in

9.5250 mm

25/64 in

0.3906 in

9.9219 mm

13/32 in

0.4063 in

10.3188 mm

27/64 in

0.4219 in

10.7156 mm

7/16 in

0.4375 in

11.1125 mm

29/64 in

0.4531 in

11.5094 mm

15/32 in

0.4688 in

11.9063 mm

31/64 in

0.4844 in

12.3031 mm

1/2 in

0.5 in

12.700 mm

33/64 in

0.5156 in

13.0969 mm

17/32 in

0.5313 in

13.4938 mm

35/64 in

0.5469 in

13.8906 mm

9/16 in

0.5625 in

14.2875 mm

37/64 in

0.5781 in

14.6844 mm

19/32 in

0.5938 in

15.0813 mm

39/64 in

0.6094 in

15.4781 mm

5/8 in

0.6250 in

15.8750 mm

41/64 in

0.6406 in

16.2719 mm

43/64 in

0.6719 in

17.0656 mm

11/16 in

0.6875 in

17.4625 mm

45/64 in

0.7031 in

17.8594 mm

23/32 in

0.7188 in

18.2563 mm

47/64 in

0.7344 in

18.6531 mm

3/4 in

0.7500 in

19.0500 mm

49/64 in

0.7656 in

19.4469 mm

25/32 in

0.7813 in

19.8438 mm

51/64 in

0.7969 in

20.2406 mm

13/16 in

0.8125 in

20.6375 mm

53/64 in

0.8281 in

21.0344 mm

27/32 in

0.8438 in

21.4313 mm

55/64 in

0.8594 in

21.8281 mm

7/8 in

0.8750 in

22.2250 mm

57/64 in

0.8906 in

22.6219 mm

29/32 in

0.9063 in

23.0188 mm

21/23 in

0.9130 in

23.1913 mm

59/64 in

0.9219 in

23.4156 mm

15/16 in

0.9375 in

23.8125 mm

61/64 in

0.9531 in

24.2094 mm

31/32 in

0.9688 in

24.6063 mm

63/64 in

0.9844 in

25.0031 mm

1 in

1.0000 in

25.4000 mm

1 1/64 in

1.0156 in

25.7969 mm

1 1/32 in

1.0313 in

26.1938 mm

1 3/64 in

1.0469 in

26.5906 mm

1 1/16 in

1.0625 in

26.9875 mm

1 5/64 in

1.0781 in

27.3844 mm

1 3/32 in

1.0938 in

27.7813 mm

1 7/64 in

1.1094 in

28.1781 mm

1 1/8 in

1.1250 in

28.5750 mm

1 9/64 in

1.1406 in

28.9719 mm

1 5/32 in

1.1563 in

29.3688 mm

1 11/64 in

1.1719 in

29.7656 mm

1 3/16 in

1.1875 in

30.1625 mm

1 13/64 in

1.2031 in

30.5594 mm

1 7/32 in

1.2188 in

30.9563 mm

1 15/64 in

1.2344 in

31.3531 mm

1 1/4 in

1.2500 in

31.7500 mm

1 17/64 in

1.2656 in

32.1469 mm

1 9/32 in

1.2813 in

32.5438 mm

1 19/64 in

1.2969 in

32.9406 mm

1 5/16 in

1.3125 in

33.3375 mm

1 21/64 in

1.3281 in

33.7344 mm

1 11/32 in

1.3438 in

34.1313 mm

1 23/64 in

1.3594 in

34.5281 mm

1 3/8 in

1.3750 in

34.9250 mm

1 25/64 in

1.3906 in

35.3219 mm

1 13/32 in

1.4063 in

35.7188 mm

1 27/64 in

1.4219 in

36.1156 mm

1 7/16 in

1.4375 in

36.5125 mm

1 29/64 in

1.4531 in

36.9094 mm

1 15/32 in

1.4688 in

37.3063 mm

1 31/64 in

1.4844 in

37.7031 mm

1 1/2 in

1.5000 in

38.1000 mm