Material hardness is a fundamental property that tells manufacturers and engineers the material’s resistance to permanent deformation. In other words, it defines a material’s ability to withstand indentation, scratching, or abrasion. Hardness correlates with a material’s resistance to wear, its strength, and its durability. It is a key parameter in manufacturing, quality, and engineering design, part performance, and aesthetics.
In this blog post, we will discuss each testing method, its advantages, and its limitations for Brinell, Rockwell, Vickers, and Leeb.
An Overview of Material Hardness Testing
A Brief History of Hardness Testing
- 1812: Friedrich Mohs introduced the Mohs scale, ranking minerals by scratch resistance, with one being the softest and 10 being the hardest.
- 1900: Johan August Brinell develops the first standardized indentation test, the Brinell Hardness Test. This material-testing method applies known loads ranging from 500 to 3000 kgf using a 10 mm tungsten carbide ball indenter. It presses into the sample surface for 10-30 seconds.
- 1919: Stanley Rockwell patents the “Rockwell Test,” which enables rapid direct readings. This test is quick and nondestructive; it determines the permanent indentation depth produced by a force or load applied to an indenter.
- 1921: Smith and Sandland introduce the Vickers test. It offers a universal scale. The Vickers hardness test presses a diamond pyramid indenter at a 136° angle into a polished surface with a specific load.
- 1975: Dietmer Leev invents the Leeb rebound test. This test made portable hardness testing more possible. The Leeb test measures hardness based on the energy loss from the impact of a tungsten carbide ball.
Why is Hardness Testing Necessary?
- Material Selection: Ensures the appropriate material is used for specific applications based on its strength and wear resistance.
- Quality Control: Verifies that raw materials or finished products will meet specifications.
- Process Verification: Confirms the effectiveness of heat-treatment and surface-hardening processes, such as hardening or annealing.
- Failure Analysis: Helps diagnose and prevent material failures.
Types of Hardness Tests and International Standards
General Types of Hardness Tests
| Test Type | Principle | Examples |
|---|---|---|
|
Indentation |
Resistance to indentation. |
Brinell, Rockwell, Vickers |
|
Scratch |
Resistant to scratching. |
Mohs |
|
Rebound or Dynamic |
Elasticity via rebound velocity. |
Leeb |
Key Standards Bodies
- ASTM International: ASTM E10-Brinell, E18-Rockwell, E92/E384-Vickers, and A956-Leeb
- ISO: ISO 6506-Brinell, 6507-Vickers, 6508-Rockwell, 16859-Leeb
- DIN: German standards, which often harmonize with ISO.
Brinell Hardness Testing (HBW)
Operating Principle
The Brinell test uses a 10 mm hardened steel or tungsten carbide ball. The ball presses into the material under a heavy load, 500-3000 kgf. The diameter of the resulting indentation is used to calculate the HBW.
Brinell Formula
HBW = 2F/πD(D-√D2-d2)
- F: Applied Force (kgf)
- D: Ball Diameter (mm)
- d: Indentation Diameter (mm)
Step-by-Step Brinell Test Procedure
- Prepare the Sample: Clean and smooth a flat test surface that is 8-10 times thicker than the indentation depth.
- Select Indenter and Load: A 10 mm tungsten carbide ball and 500-3000 kgf load. The force-to-diameter ratio will align with the material type.
- Apply Load: With the sample on an anvil, gradually apply and hold the load for 10-15 seconds.
- Measure Indentation: Use a microscope to measure the diameter.
- Calculate HBW: Use the above formula.
Types of Equipment
- Bench-Top Brinell Tester: For labs and production lines.
- Portable Brinell Tester: For large or immovable parts.
Standards
- ASTM E10
- ISO 6506
Typical HBW Values
- Soft Aluminum: ~20
- Copper: 45-80
- Mild Steel: 120-180
- Cast Iron: 180-300
- Hardened Steel: 600+
Advantages
- Excellent for materials with a variable structure.
- Globally recognized and standardized.
Disadvantages:
- Not suitable for extremely hard or thin materials.
- Leaves a large indentation.
- Slower than other methods.
Rockwell Hardness Testing (HR)
Operating Principle
The Rockwell test measures the depth of penetration of a diamond cone or steel ball indenter under minor preload and a major load. The measurement is the depth before and after the major load.
Step-by-Step Rockwell Test Process
- Prepare the Sample: Clean the sample and place it on the anvil.
- Apply Minor Load: Typically 10 kgf to seat the indentor.
- Apply Major Load: Increase to the total test force (varies by scale).
- Remove Major Load: Return to the minor load and measure the depth.
- Read Hardness Value: Directly from the tester.
Rockwell Scales Table
| Scale | Indenter | Load (kgf) | Typical Application |
|---|---|---|---|
|
HRA |
Diamond 120° |
60 |
Case-Hardened Steels and Hard Alloys |
|
HRB |
1/16″ Ball |
100 |
Copper Alloys and Unhardened Steels |
|
HRC |
Diamond 120° |
150 |
Hardened Steels and Hard Metals |
|
HRD |
Diamond 120° |
100 |
Case-Hardened Steels and Hard Alloys |
|
HRE |
1/8″ Ball |
100 |
Aluminum and Copper Alloys |
|
HRF |
1/16″ Ball |
60 |
Thin and Soft Sheet Steel |
|
HRG |
1/16″ Ball |
150 |
Bronze, Copper, and Cast Iron |
|
HRK |
1/8″ Ball |
150 |
Bearing Metals and Soft/Thin Materials |
|
Superficial (Example, HR15N) |
Diamond/Ball |
15, 30, and 45 |
Thin Layers and Surface-Hardened Parts |
Standards
- ASTM E18
- ISO 6508
Equipment Types
- Bench-Top Testers: Analog or digital.
- Portable Testers: For on-site or large parts.
Advantages
- Fast, direct readings.
- Minimal preparation.
- Small indentation, indicating it is suitable for finished parts.
- Excellent for production.
Disadvantages
- Less accurate for heterogeneous materials.
- Harmful for surface finishes.
- Standard scales are not suitable for thin parts.
Vickers Hardness Testing (HV)
Operating Principles
The Vickers test uses a square-based diamond pyramid indenter. It presses into the material at a 135° angle. The indentation diagonal is measured optically.
Vickers Formula
HV=(1.8544×F)/d²
- F: Applied Force (kgf)
- d: Average Diagonal Length (mm)
Step-by-Step Vickers Test Procedure
- Prepare the Sample: Clean and polish the material.
- Select the Load: Select the test force/load,
- Apply the Indenter: Place the sample and align the indenter, and apply for 10-15 seconds.
- Remove the Force: Remove and measure the diagonals.
- Calculate: Using the Vickers Test formula, calculate the hardness.
Note: Macro Vickers is 1-100 kgf and Micro Vickers is 10-1000 gf
Comparison Table: Macro, Micro, and Nano Vickers
| Method | Load Range | Applications | Indentation Size |
|---|---|---|---|
|
Macro Vickers |
1—100 kgf |
Bulk metals, welds, and case-hardened. |
Larger |
|
Micro Vickers |
10—10000 gf |
Thin coatings, small parts, and microstructures. |
Very Small |
|
Nano-Indentation |
<10 gf |
Thin films and nanomaterials. |
Nanometer Scale |
Standards
- ASTM E92 – Macro
- ASTM E384 – Micro
- ISO 6507
Equipment Types
- Floor-Standing Optical Testers: Can be manual or semi-automatic.
- Fully Automated Testers: With software, cameras, and mapping.
Advantages
- It is a universal scale for all materials.
- Highly precise with minimal surface damage.
- Suitable for hardness profiling and microstructures.
Disadvantages
- Requires a polished, well-prepared surface.
- Optical measurements can lead to human error.
- Slower than other tests.
- Higher cost for equipment.
Leeb Rebound Hardness Test (HL)
Operating Principles
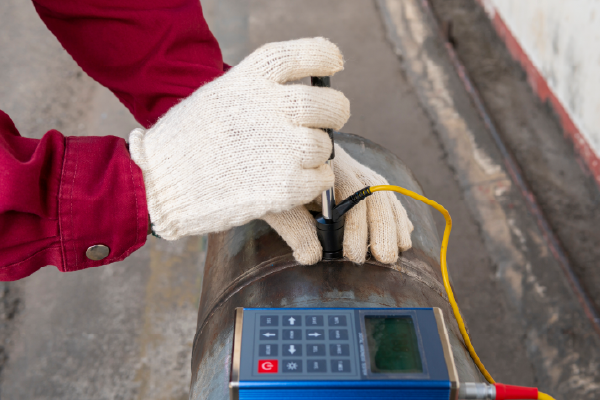
The Leeb test is dynamic and portable. Using a spring-loaded body strike on the material. The device measures the ratio of the rebound velocity to the impact velocity.
Leeb Formula
HL = 1000(Vr/Vi)
- Vr: Rebound Velocity
- Vi: Impact Velocity
Step-by-Step Leeb Test Procedure
- Prepare Surface: Clean, smooth, and ensure sufficient mass and thickness of the component.
- Select Impact Device: Based on the geometry and material.
- Set Up: Place the device perpendicular to the component.
- Perform Test: Cock and release the impact device. The readout displays the HL.
- Repeat: At least five strikes and readings on average.
- Calibrate: Use standard blocks as required.
Impact Device Types
- D: Standard for most metals.
- DC: Great for confined spaces.
- DL: For grooves and toothed surfaces.
- C: Thin and surface-hardened layers.
- G: Large, coarse-grained materials, for example, cast iron.
- D+15: Grooves and concaved surfaces.
- E: For fine measurements.
Note:
- HL Values: Device-specific, for example, 780 HLD.
- Conversion: HBW, HRC, and HV are possible but introduce uncertainty. Direct measurements are preferable for vital applications.
Standards
- ASTM A956/A956M
- ASTM E110
- ISO 16859
- DIN 50157
Equipment Characteristics
All Leeb testers are portable, handheld, and battery-powered.
Best Use Case Scenarios
- Large, heavy, or fixed components, such as pressure vessels, turbines, and structural steel.
- On-site inspection in construction, maintenance, and manufacturing.
Advantages
- Portable for testing in tight spaces, on large structures, or installed equipment.
- Quick, ~2 seconds per reading.
- Minimal surface damage.
- Immediate digital readouts and conversions.
- Ideal for on-site/field testing on a wide range of metals.
Disadvantages
- Sensitive to curves and surface roughness.
- Requires a certain sample mass and rigidity.
- Conversion to other scales may add uncertainty.
- Less accurate on very soft or thin materials.
- The operator’s technique may impact results.
Determining the Right Hardness Testing Method
| Method | Best For | Portability | Speed | Surface Prep | Indentation Size | Accuracy | Cost |
|---|---|---|---|---|---|---|---|
|
Brinell |
Castings, forgings, and coarse metals. |
Low |
Slow |
Moderate |
Large |
High (average) |
Moderate |
|
Rockwell |
Steels and production parts. |
Moderate |
Fast |
Low |
Small |
High |
Moderate |
|
Vickers |
Thin layers, coatings, and ceramics. |
Low |
Moderate |
High |
Very Small |
Very High |
High |
|
Leeb |
Large or fixed parts and field testing. |
High |
Very Fast |
Moderate |
Very small |
Moderate |
Moderate |
Guidelines
- Lab Testing/Bulk Metals: Brinell or Rockwell
- Thin Layers, Coatings, or Microstructures: Vickers – Micro or Nano
- Large, Immovable, or In-Service Parts: Leeb
- Production Line and Fast Throughput: Rockwell
- Heterogeneous or Course-Grained Materials: Brinell
FAQs
What are the advantages of hard materials?
Hard materials offer superior durability, wear resistance, and structural integrity, making them ideal for demanding applications. They can withstand high loads, resist deformation, and maintain their shape and performance over time.
What are the disadvantages of hard materials?
Hard materials can be brittle. They may be prone to breaking or cracking under stress. They may be more difficult to machine or shape. In this case, longer production times and higher costs may occur. Hard materials are less flexible, limiting their ability to absorb impacts.
Can low-hardness materials be made harder?
Yes, low-hardness materials can be made harder through various processes. These treatments include heat treatment, surface hardening, or alloying with harder elements.
What is case hardening, and what are the different types?
Case hardening is a heat treatment process. It hardens the surface of a metal part while maintaining a softer, more ductile core.
The different types of case hardening include:
- Carburizing: Infusing carbon into the surface to increase hardness.
- Nitriding: Infusing nitrogen to create a hard, wear-resistant surface.
- Cyaniding: Infusing both carbon and nitrogen for improved hardness and wear resistance.
- Induction hardening: Using electromagnetic induction to harden the surface.
What is quenching?
Quenching is a heat treatment process that rapidly cools a metal, typically steel, after heating it to a high temperature. This process helps to harden the metal and improve its mechanical properties.
What is precipitation hardening?
Precipitation hardening is a heat treatment process. It increases the yield strength and hardness of certain alloys, such as aluminum, stainless steels, and nickel-based superalloys. It involves the controlled aging of the material by dispersing particles within the material’s grain structure. They block dislocations and prevent deformation.
What is anodizing?
Anodizing is an electrochemical process. It converts the surface of aluminum into a durable, corrosion-resistant oxide layer. The process enhances the metal’s aesthetics, protects it from environmental damage, and can be used to create a variety of decorative finishes.